DataTrim Dupe Alerts allow you to mass merge 1000’s of duplicates.
Whether you are having a very large database and many duplicates, or if you have migrated data from multiple sources into salesforce, you might find you self with 1000’s of duplicates.
Too many dupes to process one by one, and too important to just delete the dupes in a quick sweep.
With DataTrim Dupe Alerts you can now Merge or Convert 1000’s of records with a few clicks. Read more about deduping large database in this article: Big Deduplications or How to Eat and Elephant ?“Sometimes you just need clean (dupe-free) data as quickly as possible!”
Considerations before you start you Mass Merge
Before kicking off the Mass Merge or Mass Convert consider this:- Which of your many duplicates are you comfortable merging blind folded? You may consider some records as “obvious” dupes, but how do you identify them from the vast amounts of dupes.
- When merging, which records are going to be survivors and which are the dupes -which will go away? For Leads being dupes of Contacts, or Prospects being dupes of existing clients, the choice is not difficult, but in other satiation you might have to look values like last updated, most recently created or record with the highest lead score, highest data quality score, most opportunities etc.

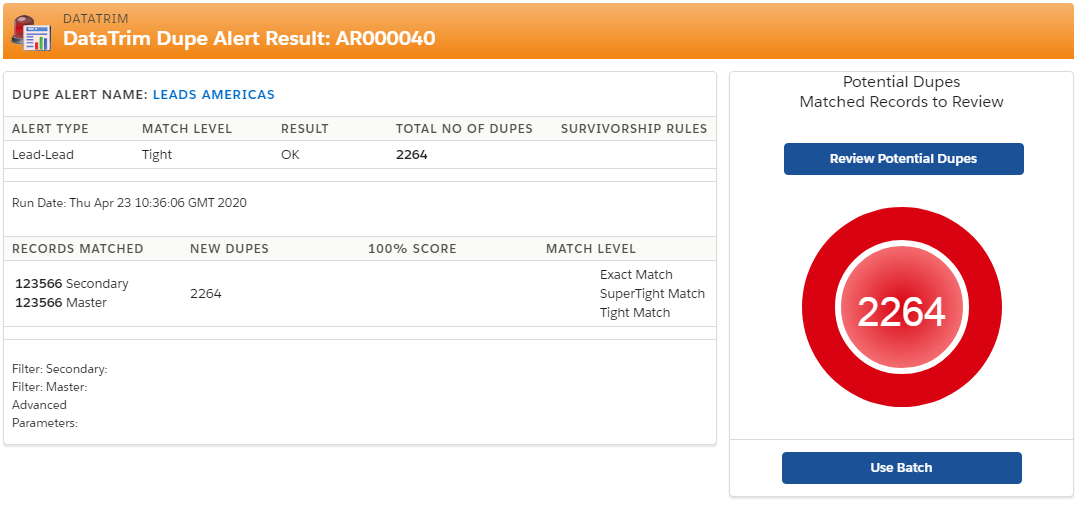
Image: Use Batch From the Dupe Alerts Console, via the drop-down menus at the Alert or Alert Result section.
Use Batch
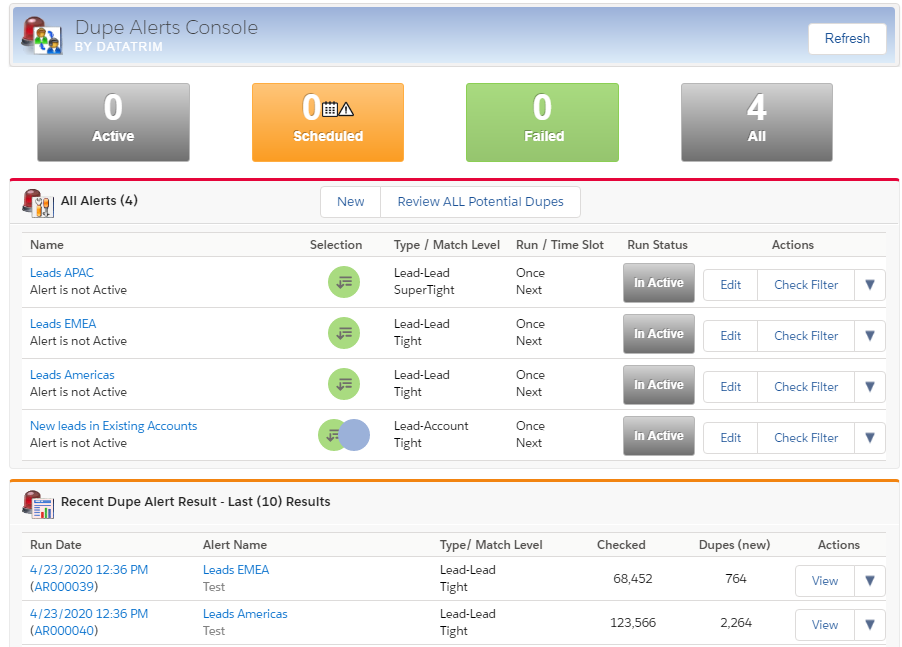
In the DataTrim Dupe Alerts Console, where you manage your Alerts, you can create alerts for different sets of records, and thus group your “obvious” dupes, so that you can merge/convert these in large volumes. See this article on how to use the filters to create alerts which only matches selected sets of your data e.g. Prospects being matched against Clients. You can use the “Use Batch” option on the durectly from the Dupe Alerts, the Dupe Alert Result, or launch the Batch Processing Wizard dirctly from the Dupe Alert Console main page.
Image: Use Batch Button from DataTrim Dupe Alerts Result
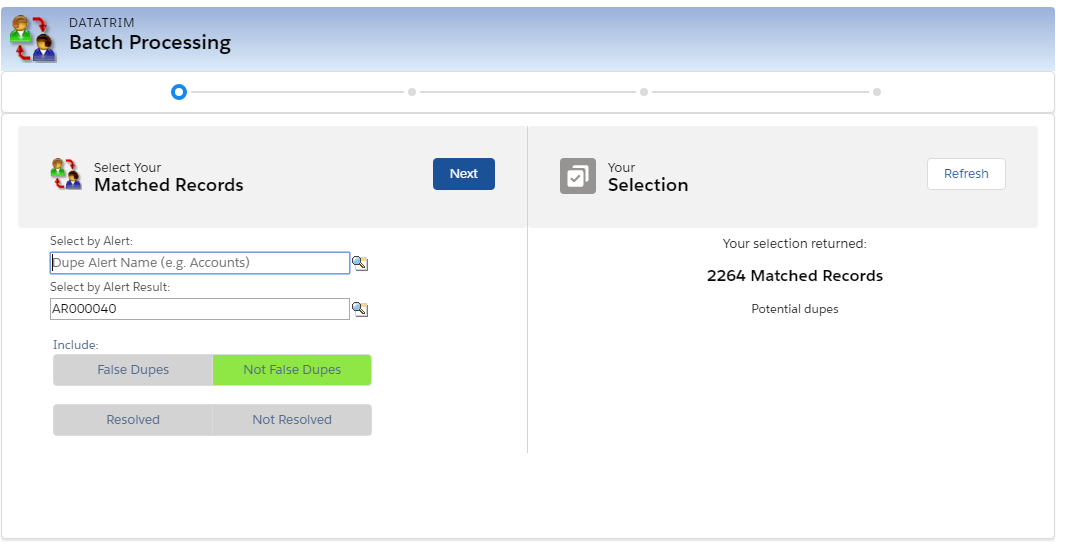
Step 1 – Select by Alert or Alert Result
From the DataTrim Dupe Alerts Console, or the DataTrim Dupe Alert Result you can go directly to the Batch processing page. Once the DataTrim Batch Processing page shows the Alert or Alert Result will be selected by default, limiting your process to Matched records which are associates with either the Alert or the Alert Result. By default you should exclude the Matched Records which previously have been set as False Dupes, so that this information isn’t lost during the merge.
Step 1: Select Matched Records to Process
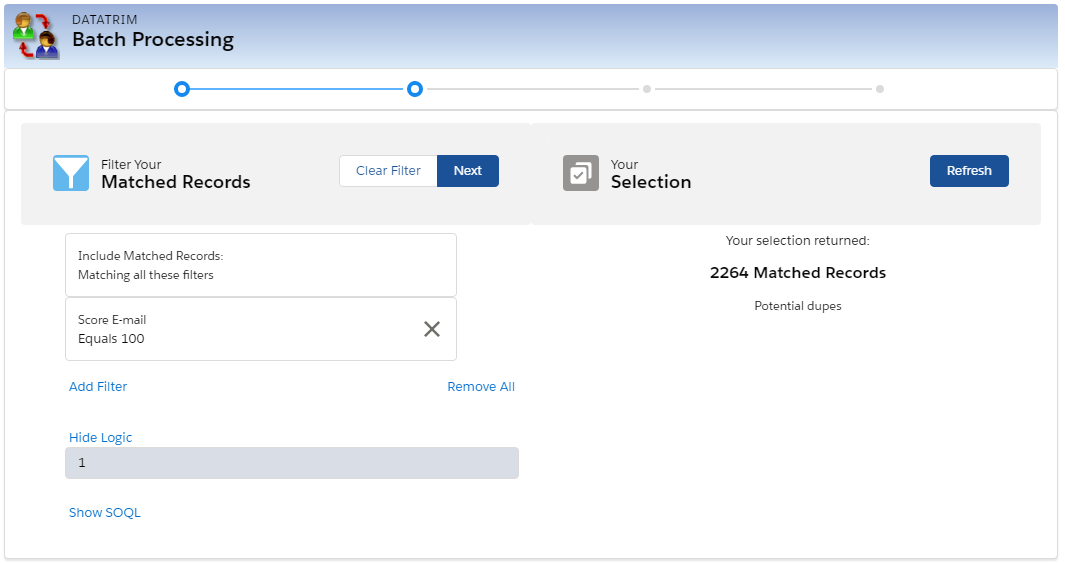
Step 2 – Refine your Selection Using a Filter
If you want to refine the selection, you can add additional filter criteria. The Filter also allows you to filter records with various scores on individual fields, owners, country etc. The Filter will allow you to a) test with a few selected records, and b) apply your criteria for “Obvious dupes”.
Step 2: Refining the selection using a filter
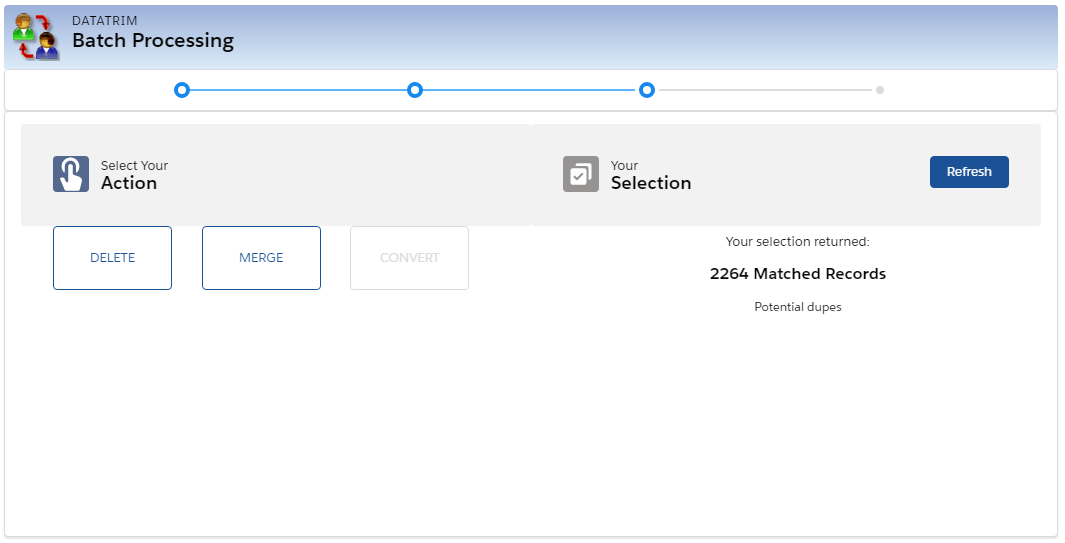
Step 3 – Select the Operation to perform on our selection
Once your selection is defined it is time to take action.- Delete: Delete the Selected Matched Records – Option to use to clean out results from previous and outdated Dupe Alerts
- Merge: Merge the records from the selected Matched Records. Applies to Match Type: Lead-Lead, Account-Account and Contact-Contact
- Convert: Convert the records from the selected Matched Records. Applies to Match Type: Lead-Contact and Lead-Account.

Step 3: Selecting an action for the Matched Records
Step 4 – Mass Merge
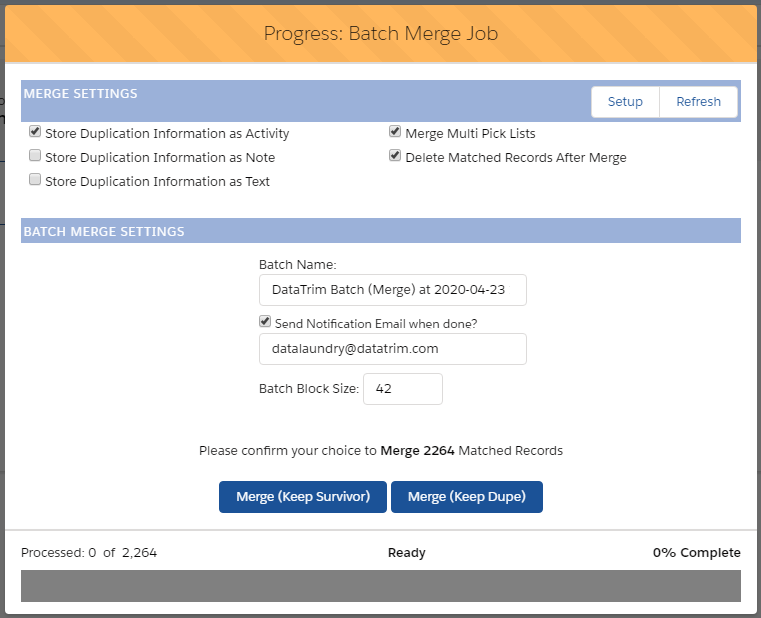
To perform a Mass Merge in Batch, simply select your Merge and Batch Settings, and confirm your action by choosing whether you want to Merge and keep the records labelled as Survivor as your new Master, or Merge and keep the records labelled as Dupe as your new Master.
Note: You will find more detailed description of each of the options in the Setup and User guide
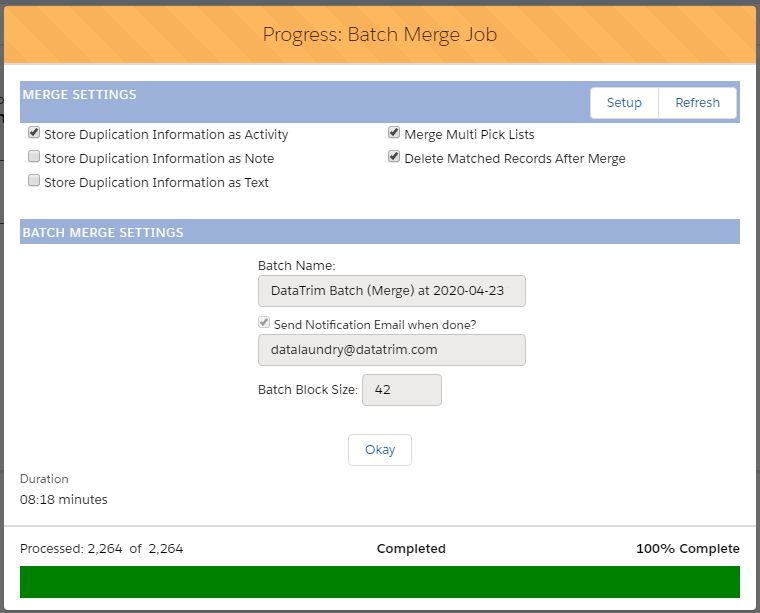
Once the Merge Job is completed you will receive a notification email, with the result of your Batch Merge Job.
Note that the Batch Job may take a long time to process. If you have triggers and work-flows which are trigged when the involved records are updated (survivor) and deleted (dupe), then this will all execute and delay the process.
Step 4 – Mass Convert
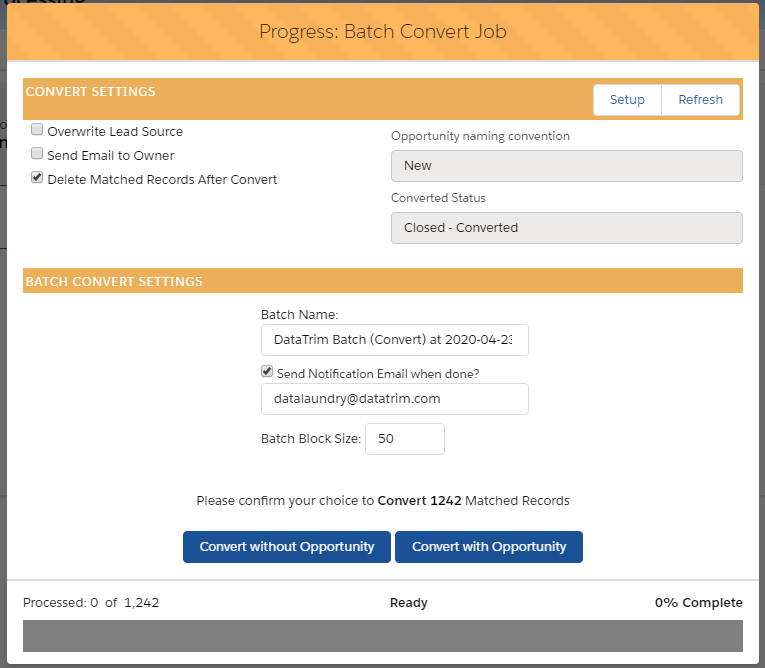
To perform a Mass Convert in Batch, simply select your Convert and Batch Settings, and confirm your action by choosing whether you want to Convert with or without the creation of opportunities.
In the settings you can, select a naming convention for the Opportunities, this will allow you to customize the way the new opportunities are names, so that you easier can find them once the convert is done.
Note: You will find more detailed description of each of the options in the Setup and User guide
Once the Convert Job is completed you will receive a notification email, with the result of your Batch Convert Job.
Note that the Batch Job may take a long time to process. If you have triggers and work-flows which are trigged when the involved records are updated (contact) and flagged as ‘isConverted‘ (lead), then this will all execute and delay the process.
Step 4 – Mass Delete
Deleting the Matched Records without affecting the lead, contact or account records associated with the Matched Records. The process is similar to the Merge or Convert process.Your Mass Merge notification
Once your Batch Job has completed, a notification email is sent to you, or the email address you provided in the settings.
This email will outline the result of the process, and eventually highlight any issues encountered during the process.
Any Matched Records, which for any reason failed to Merge/Convert might subsequently need to be reviewed manually.

